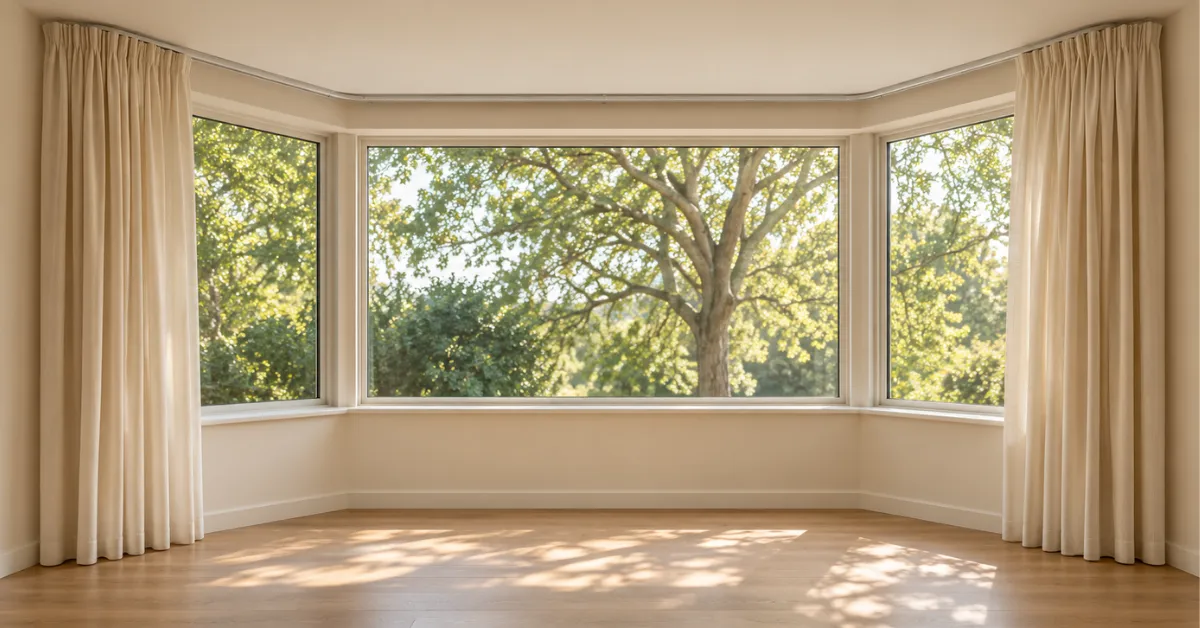

Want to Hang Curtains in a Bay Window?
You can either use a bay-shaped curtain track to allow your curtains to glide around the corners, multiple rods to provide individual control over each window or one single rod to shut off the whole bay window.
Decide on what style you want to use. This will influence the size of hardware, number of panels and where the fabric will gather when open.
1. What’s the best way to hang my curtains?
Decide what you want to show when the curtains are open and what you want to hide when they are closed. If you are using your bay window as a reading nook you may want your seat to be visible all day long. If you tend to open one window more than the others, having individual curtains will make it easier to access.
| Layout | Where the hardware goes | How the curtains open | Where the fabric gathers |
|---|---|---|---|
| Track or specialist pole following the bay | Along the angled or curved walls inside the bay | Panels can travel around corners with compatible hardware | Wherever the system allows the panels to park, often at the outer ends |
| Separate rod on each section | Above or inside each individual window | Each section opens and closes independently | At one or both ends of each rod |
| One straight rod across the bay | Across the front of the alcove | Panels draw straight across the opening | On the room-facing wall at either side, if there’s space |
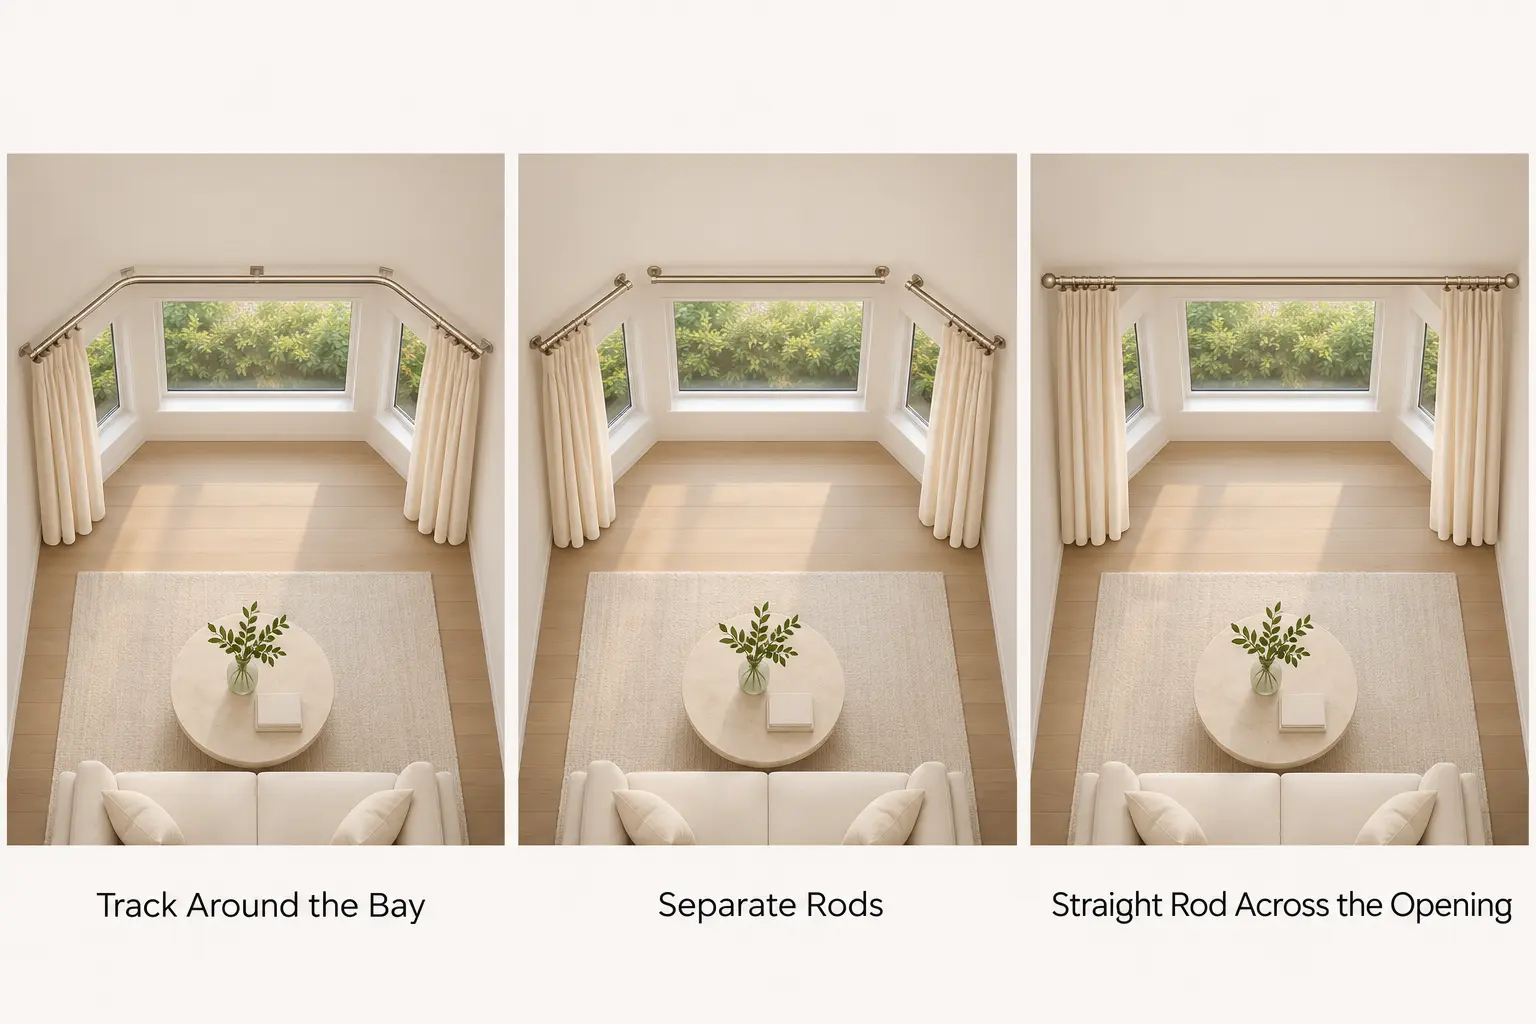
A three-sided bay window with angled sides will be perfect for a bay-shaped track. This allows you to have one pair of curtains covering all three areas. If you want control over how much light comes into each window individually then individual rods will be useful. If your bay window is a square box shape then make sure you measure the tighter corners. Curved bay windows will require curved bay hardware.
Before purchasing make sure you know where your fabric will gather. Even in a fully open position your curtain fabric will take up some space. This is known as stackback. If your bay window only has a thin strip of wall at either end of the bay you may still have a thick lined curtain covering part of the side glass. If you want maximum glass showing then plan your open curtain positions carefully.
2. Can my curtains glide around the corners?
Yes, if your hardware and curtain fittings allow. With a rod you can have one that is shaped to the bay window. However, with many standard rods your curtain rings will stop at the elbow or bracket.
| Hardware | Can the curtains pass around corners? | What to check before buying |
|---|---|---|
| Bendable or made-to-measure curtain track | Yes, when the track and gliders are compatible with the bends and any joins | The minimum bend radius, mounting options, support spacing, and load rating |
| Specialist bay pole with passing rings | Yes, where the rings can pass the fittings in their path | Whether the rings pass both the corner fittings and the support brackets on that specific system |
| Standard rods joined with elbows | Usually the panels stay on their own sections | How many panels each run needs and where they’ll meet at the corners |
| Separate rods | Each panel stays on its own rod | End clearance for the brackets, finials, and gathered fabric |
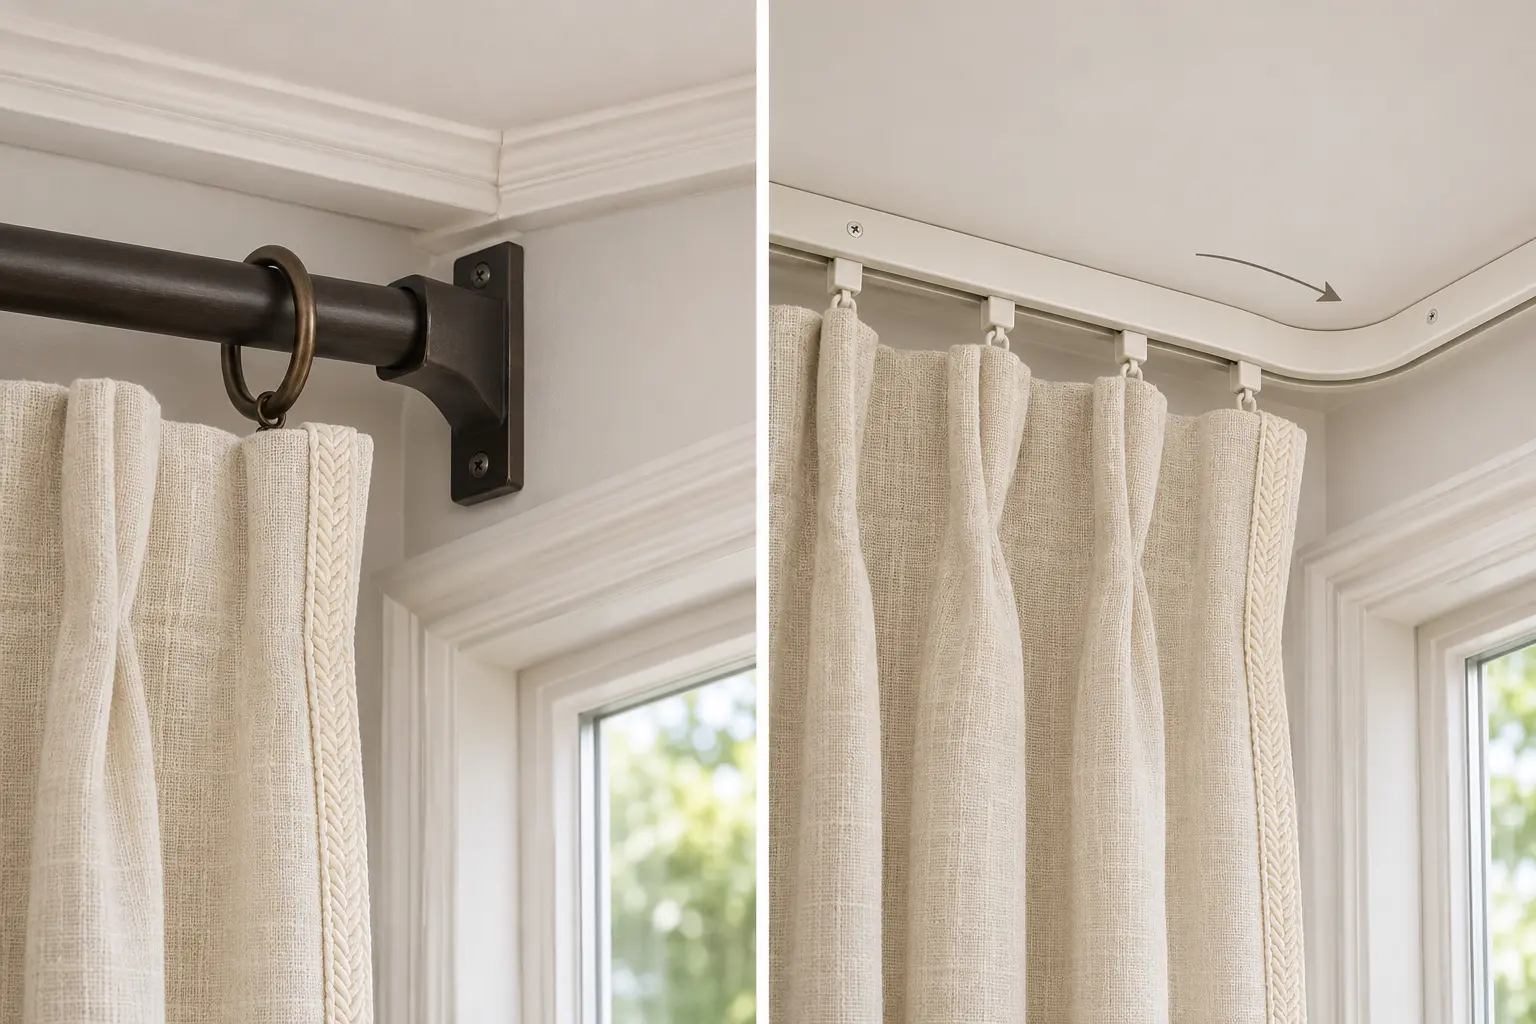
Check your curtain headings. Eyelet curtains are designed to glide directly on your pole. If you are using a track look for hooks or curtains designed for your system. If you already have your curtains then start from the headings.
Try running a single empty ring or glider through your curtain path. This will give you an idea of where your curtain panel can go.
3. How to measure a bay window for curtains
Measure along your curtain path. Although knowing the width of the glass will help you describe your bay window, the measurements you take will help determine the number of curtain panels you will need.
You’ll need a tape measure, pencil, painter’s tape, level and something to write down your angles if you’re using bay-shaped hardware. A simple overhead drawing will help.
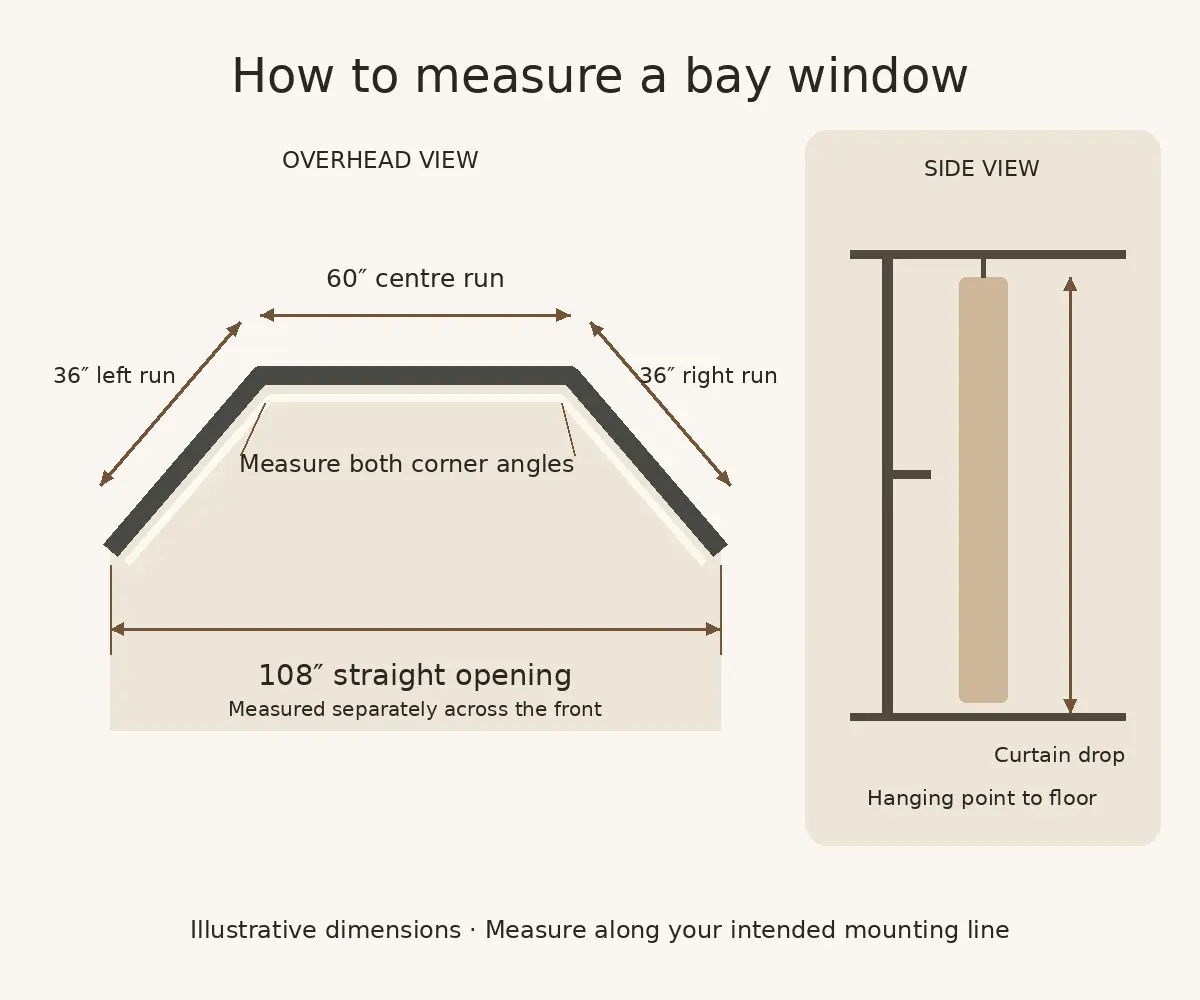
Bay-shaped track or pole
- Mark up your curtain path. Decide whether you’re hanging from your ceiling or wall. Ensure you allow enough space for your curtains to clear the handles, trims, blinds and sill.
- Measure your runs. Measure left, centre and right. If you have more than 3 sections in your bay window then draw a simple diagram and label each section.
- Measure your angles. Even if your bay window looks symmetrical always measure both angles. If purchasing bespoke hardware use your supplier’s templates and make sure you know which side of the angle they want.
- Measure both ends. This will tell you how much space you have for your end caps or finials and how much room your fabric has to gather.
- Measure your finished drop. Measure from where your chosen heading will hang to the floor, sill or seat. If your floor or seat isn’t even, measure a few points.
If you have a curved bay window (bow window) ask your track supplier how they want it measured or templated. The straight measurement between the ends doesn’t take the curve into account. Dunelm’s bay window measuring guide shows how measuring varies by bay shape and hardware.
Individual rods
Measure each window section. Mark up where your left and right brackets will go. Ensure there is enough space between the ends of your rods and the next section. Thicker finials can cause issues in tight corners so include the end fittings in your dry fit.
Measure your drop for each section. If you’re using tension rods in your recesses, measure the internal width at the exact height your rod will be.
Single rod
Measure the width across the front of your bay window. Ensure you allow enough space on either side. If you’re extending your rod out to allow your curtains to gather away from the bay then allow for this in your measurements.
Measure your drop from your hanging point to the floor. The floor in your bay window could be a different height.
4. How many curtain panels do you need?
Calculate how wide you want your coverage to be. Multiply this by the fullness for your curtain heading to work out how much fabric you need. Fullness is how much flat curtain you have against the width you want to cover. If you want 2× fullness and you have a 60-inch span you will need around 120 inches of flat curtain.
Total flat curtain width = Coverage width × Fullness
If purchasing ready-made curtains check if the width given is for one panel or the pair. If purchasing bespoke or pre-pleated curtains, check if the width given is flat or finished.
Example
If your runs are 36″, 60″ and 36″ and you have a straight measurement of 108″, here’s what you need at 2× fullness.
| Layout | Coverage width | Total flat curtain width | One way to divide it |
|---|---|---|---|
| Track following the bay | About 132″ along the three runs | About 264″ | Two panels of about 132″ each for an equal centre split |
| Separate rods | 36″ left, 60″ centre, 36″ right | 72″ left, 120″ centre, 72″ right | One panel per section, or divide each section’s width between two panels |
| Straight rod across the opening | 108″ before any side extensions | 216″ | Two panels of about 108″ each |
These are just examples. When ordering your finished curtain ensure you know how much coverage you’ll have from your finished track or rod. This could be affected by how much your panels overlap in the middle or how much your fabric folds back towards the wall. A curved bend can also mean your finished track won’t be the total of your runs.
If you’re using individual rods calculate each section and purchase accordingly. In this example, 3 panels of 88″ would give you 264″. However, the centre window won’t have enough fabric as it should have 120″. Use the Loom & Fiber Curtain Width & Fullness Calculator to work out the panel widths for each section.
5. How to fit your track or rod
Gather your hardware, tape measure, pencil, level and a sturdy stepladder. Fix the hardware as instructed for your system. If you’re using screws ensure you use the correct fixings and method. Ensure you have the correct spacing on your supports and the weight rating for your full curtain including any linings and fittings.
Bay-shaped track
- Mark your path. Use painter’s tape to mark your track and bracket positions. Ensure you have your windows open and any blinds working while marking your path.
- Dry-fit your track. Hold your track up to your marked path. Ensure there is enough space at the corners and ends. If you’re using a flexible track follow the instructions to bend it. Don’t exceed the manufacturer’s bending guidelines.
- Fit your supports and track. Follow the manufacturer’s instructions for your brackets, gliders and end caps.
- Test your glider. Run your glider through all parts of your track. If it catches in the corners or joins then adjust the fitting before hanging.
- Hang your curtains. Fully open and close them to ensure the fabric gathers where you planned, your panels meet and your hems don’t hit your seat or sill.
Individual rods
- Mark your rod heights. Ensure the marks for each rod are level. If you want your tops to line up, ensure you have a common height where possible.
- Hold your brackets and ends in place in the corners. Ensure you have enough space for your fittings and fabric on adjacent rods.
- Fit your brackets and any supports. Load your rings or panels in the order required by your hardware. Secure your rods and end fittings.
- Fully close your curtains and check from inside your room. If you can see a gap check your end. Where does your last ring or clip stop? Is there enough width to reach the edge?
Single rod
- Mark your brackets. Mark where your brackets will go across the front of your alcove. If you have enough wall space then ensure your ends are positioned so your open panels sit clear of the opening.
- Fit your rod and any required supports. If using a standard centre support plan to have one panel on each side.
- Hang your curtains. Ensure you can fully open and close them. If you have a window seat sit down to check your closed curtains.
6. What if the bay has a window seat, radiator or blinds?
The best length will depend on what is underneath or behind your window. Ensure you have your curtains in the correct position by setting up your room as usual. This includes having your seat cushions in place, your windows open and your blinds raised.
| What’s in the bay | What to check |
|---|---|
| Window seat | If the curtains follow the bay, a shorter drop can keep the fabric clear of the cushions. Measure with the cushions in place. If the rod spans the front, check whether closing the curtains will enclose the seat. |
| Deep sill | Decide whether the curtains will finish above the sill or hang in front of it. For a longer drop, check whether the track or rod projects far enough for the fabric to fall freely. |
| Radiator or heater | Check the unit manufacturer’s curtain and clearance instructions. Measure where the fabric will sit both open and closed before deciding on hardware projection and hem length. |
| Roman shades or blinds | Open and raise the shades or blinds, then check their deepest point, including the headrail and the folded fabric. Allow enough projection for the curtains to pass and leave access to the controls. |
| Window handles that project into the room | Turn the handles and open the windows before marking the final hardware line. Check that the curtain folds clear the handles in use. |
Once you have decided where you want to hang your curtains use the Loom & Fiber Curtain Length Calculator. If you’re layering your window treatments check How to Hang Curtains With Roman Shades or How to Put Curtains Over Blinds for more information on how much clearance you need.
7. Can I hang bay window curtains without drilling?
Yes, if each window recess can take a tension rod or your trim is suitable for tap-in brackets. Usually the easiest way to plan without drilling is to do each section individually.
- Tension rods fit between two opposing surfaces in each recess. Ensure you measure at the exact height you want to hang from. Ensure the rod is suitable for your surface and can take the weight of your curtains. If your recess isn’t very deep your fabric may be too close to the glass or handles.
- Tap-in brackets will only fit certain trims and shapes. Check with your hardware manufacturer what they require. They can leave marks on your trims.
If you need one heavy pair of curtains to go round your bay window find a track or pole that can handle the movement and weight of your combined panels. Decide on your fixing method based on the systems you have.
8. How to fix gaps, snagging and bunching
| Problem | What to check | How to fix it |
|---|---|---|
| The curtain stops at a corner | Does the ring hit a connector or a support? Does a glider catch at a joint? | Test the empty fitting. If it’s a standard rod, use separate panels on either side of the obstruction or switch to compatible passing hardware. If it’s a track, check that the join is aligned according to the instructions. |
| Daylight shows through the corners | Do the panel edges reach each other when the curtains are fully closed? | Reposition the last hooks or adjust where the panels meet if the hardware allows it. If the panels fall short, check whether you need extra width or an overlap. |
| Open curtains cover too much glass | Is there enough space for the fabric to gather at the ends? | Park the panels farther toward the ends if the system allows it, or use holdbacks where they’ll pull the fabric clear of the glass. |
| The hem catches on a seat or sill | Does the curtain touch the obstacle along its full path or only at one point? | Move the hanging line forward if the hardware allows it, or shorten the hem to clear the highest point it passes. |
| The curtain rubs against blinds or handles | Is the rod or track far enough from the wall for the folds to pass? | Check whether the system allows more projection, then test the curtain with the blinds and windows in use. |
If you use holdbacks, gather the curtain by hand first and mark the position with painter’s tape. Check how much glass it exposes and whether the fabric clears the handle. Once you’ve found a position that works on both sides, use Loom & Fiber’s Where to Place Curtain Holdbacks guide to refine the height and spacing.
FAQs
Most designers recommend having one set of curtains following the bays. This avoids adding extra weight to the fittings and having too much fabric blocking your windows. If you have more than three sections in your bay you could have one curtain for each section.
No. Eyelet and tab top curtains are not suitable as they have straight holes to go over the pole. You can get specialist eyelet bays which will fit around your eyelet curtains but they are only suitable for light fabrics and are an expensive option. Ring or hook curtains offer so many more options.
At least 10-15cm (4-6ins) above the frame. Many installers will recommend putting them halfway between the top of the window and the ceiling. However a higher pole/track will make your window appear higher, so putting it around 20cm (8in) will help. If you do not have much space you can fit a track to the ceiling inside the bay.
It depends on the shape of your bay window. If your bay has square corners with 90degree angles you can have straight rails. However if your bay is angled, spread or curved then flexible tracks are best to allow the curtains to glide around the corners.
If you have window seats ensure that your curtains just float above the cushion. If you have a radiator do not let your heavy curtains block the heat. Using dress curtains with a blind behind is a good idea.
Typically a bay window will have 3 angled sections whereas a bow window will be rounded with 4 or 5 even sections. Usually the same solutions can be used on both however if you have a bow window a flexible track would be best as straight rails will not bend.